Hey Cats!
It's been SO LONG since I've posted! I've been super busy with camps and getting ready for college, so I haven't really had time to blog, much less craft! This is something for my dorm room, and I feel like it's kinda cheating, because I painted it with my friends at the beginning of summer. But I'm going to share anyways! As I may have told you, my room is a beach theme. I wanted to incorporate the theme without making it look like a tacky beach house, which has been slightly difficult. I thought that the little rope detailing on this trashcan gave it just the right touch of nautical-ness. You can definitely change this up to match whatever room you're wanting to put it in. I've actually painted one for my room at home, and my sister painted one for our bathroom. It's a great way to add a pop to a room, and it's a good small project when you're feeling slightly crafty. Anyways, here's what you'll need:
- 1 wooden trashcan (I've always gotten them at Hobby Lobby)
- Acrylic paint of your choice (navy & white for stripes)
- Masking tape (for making stripes)
- Hot glue gun
- 1 piece of clean rope that will go around the top of your trashcan
Here's what you do!
1) Paint your trashcan in whatever color or pattern you'd like. For my stripes, I painted the entire trashcan white (I'd recommend using multiple coats). Then, I placed masking tape in straight lines, leaving stripes in between the tape that were the width of the tape. Make sure you press down the edges of the tape so the paint doesn't seep through. Paint the spaces in between the tape and remove the tape when it's dry! I also recommend painting the inside and bottom of the trashcan for a more polished look.
2) Next, cut your rope to a length that will go all the way around the top of the trashcan, giving yourself no more than an inch extra.
3) Tape the ends of the rope so it doesn't fray.
4) Glue one end of the rope to a corner of the trashcan, making sure it lines up directly. You should use a thin line of glue and will probably have to hold it down a while for it to stay.
5) Continue gluing the rope onto the trashcan in small sections.
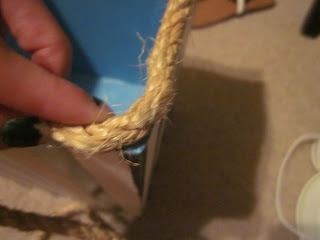
6) When you reach a corner, chances are (unless you use super skinny rope) you will have to cut the corner in order to turn. Just glue the rope all the way to the corner and then just skip the pointed part of the corner. This is a little hard to explain, so just look at the picture :)
7) Continue gluing the rope until you reach your starting point. You might have a little rope left over, but don't cut it off!
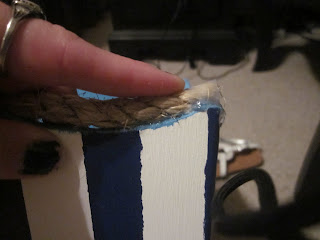
8) Take the extra rope and glue it on top of the other rope, as if you were going to wrap it around again. This time will require LOTS of glue, and you'll probably need to hold it down for a few minutes to make sure it sticks.
I know this looks a little messy, but just put this part against the wall :)
And you're done! Here's what it looks like!
I'm super excited about this, and I can't wait to see it in my dorm room in 6 DAYS!!! OMG. That being said, since I'm going to college and might have actual social events to attend, I'm not really sure how often I'll be crafting. I won't give it up of course, but it might not be such a giant part of my vida anymore. :( BUT I'm taking all my stuff with me! I have a tub to put it in and everything! So, until next time, whenever that may be!


No comments:
Post a Comment