Showing posts with label recipe. Show all posts

Wednesday, April 17, 2013

Recipe-Easy Alfredo Sauce

Hey Cats!

The other day I was looking for something different to make for dinner, and I had leftover whipping cream from another recipe. So naturally, I thought of alfredo sauce. I really enjoy alfredo on pasta, but it's really rich so I don't eat it very often. Also, I thought it was going to be difficult to make, but it was actually really easy! I found this recipe on Pinterest, but adapted it a little by using ingredients I already had! Here's the original recipe http://ericagilliam.blogspot.com/2011/11/homemade-alfredo-sauce.html. And here's my version!

You will need:

I always buy the HEB brand-it's cheaper, and sometimes tastes better!

-4 Tablespoons of butter
-1 Cup heavy whipping cream
-6 Tablespoons Monterey Jack cheese (the original recipe calls for parmesan, but I had MJ on hand! I also want to try this with mozzerella!)
-Garlic powder to taste
-Black pepper to taste

Here's what you do!

I feel Paula Deen would approve this recipe.
1. First, melt the butter over medium heat in a medium-sized saucepan.

2. Next, pour in the cream and heat until it is warm, about 3-5 minutes. Make sure you're still on medium heat, you don't want to burn the cream!

3. Then, whisk in the cheese! I added a little more than 6 tablespoons, because I love cheese. Whisk until there are no more lumps, about 1-2 minutes. I'm also hoping to try this recipe with a variety of cheeses.

4. Add the garlic powder and pepper according to your preferences. I added quite a bit to give it a little extra flavor, but make sure you start small and add a little at a time-once it's in you can't take it out!

5. Let it simmer for about 10-12 minutes, stirring occasionally. This thickens the sauce and allows the flavors to mix together.

6. Finally, pour it over your pasta and enjoy! Also, this is my new favorite type of pasta. It's called cellentani, and I love the fun squiggly shape. It also holds a lot of sauce, which is the best part of pasta.

I hope you give this recipe a try! It's really easy, delicious, and there's not a lot to clean up! You could make it a little fancier and add grilled or sauteed chicken and peas, cherry tomatoes, or anything else you can think of! Until next time!

Tuesday, September 18, 2012

Kristen Learns to Cook- Part 1

Hey Cats!

Since you last heard from me, I have moved into a new house, gone back home once, witnessed the Aggies lose their first SEC game (can't even talk about it), and attended 3 &1/2 weeks of school. During this time, I have been perfecting my cooking & other domestic skills like cleaning and entertaining. But mostly cooking. That was one reason I was so excited to move out of the dorm and into anywhere with a kitchen. I absolutely love being able to make whatever I want for dinner, and not being forced to eat either a Lean Cuisine or junk food from the places on campus. Throughout the past month, I've also discovered that I love to cook dinner. It's fun to come up with new ideas & try out new things. So, I have decided to blog about my adventures as I learn to become a gourmet chef. Although I started this process a few weeks ago, I still have a long way to go (I burn something at least once a week) and I'd love to share my kitchen endeavors with you! I typically cook small portions, usually just myself, and I use what I have in my pantry (which isn't a lot), unless I'm dying for something different. So, without further ado, here's what I'm having for dinner tonight!

Salsa Chicken
I half made this recipe up and half got it off the internet. It's been about a week and a half since I've been to the grocery store, so I have very little to work with. I also bought a jar of salsa for the 1/4 bag of tortilla chips I had left over, and the chips are gone but the salsa is still here. I also didn't have taco seasoning, so I had to get creative. I'm eating it as I type this, so I know it's delicious!
Here's what you'll need:
1 or 2 small boneless, skinless chicken tenders, thawed. (I bought a huge bag of individually frozen tenders. They're smaller than chicken breasts, and they will last you literally forever. This is a staple in my fridge.)
Salt
Pepper
Garlic Powder
Onion Powder
Chili Powder
At least 1/2 jar of salsa (I used Joe T's because that's my fave.)
Shredded cheese

Here's what you do:
1. Preheat your oven to 350
2. Lay the chicken in a small baking dish, and sprinkle seasonings on both sides.
3. Spoon salsa (however much you want) on top of the chicken.
4. Bake for 25 minutes. Be sure to cut into it & make sure it's cooked, I've heard food-borne illnesses are quite unpleasant.
5. Sprinkle a little cheese on top & pop it back into the oven for a few minutes until the cheese has melted.
6. DINNER.

I paired mine with a little rice & corn for a balanced meal. I keep bags of frozen vegetables like corn & green peas on hand & throw a little into a bowl with a splash of water into the microwave for about 3-5 minutes. That's probably not the best way, but it's better than not eating vegetables, and I don't have to clean an extra pot.


So there it is! It was super delicious if I do say so myself. Hopefully I'll go to the grocery store soon & come up with some new ideas! Until next time!

Thursday, June 28, 2012

Princess Pink Cookies

Hey Cats!

I know that I said my next blog post would be about my day in NYC, but I haven't wanted to do that yet. Also, since I plan on becoming the next Martha Stewart, I decided blogging about food would be a step in the right direction. But I really am going to post about it soon, before I forget! Before we get to the star of the show, let me tell you a little bit about my summer. I've been taking my math class, so that's what I do in the mornings, and study a little at night. It's actually my most sucessful attempt at a math class in my entire life, so I'm pleased with that. I also have like, 5 other craft projects I'm working on, and I'll be excited to share those when (if) I finish them! I also have been searching all over town for a paperback copy of Mockingjay. I read the first two Hunger Games books in less than a week, and I'm absolutely DYING to read the third. I found one today at WalMart, but in the checkout line, I realized it was large print, so I put it back. I have a thing about large print books. They just bother me & my eyes kind of freak out. Also, I feel like I'm reading a "chapter book" I would have read in like, the second grade. You know what I mean. Books like Junie B. Jones, The Magic Treehouse series, and whatever else you read as a child all have that like, 20 point font. That's what large print reminds me of, and since I am no child, I can't stand it. So, the search continues. I started reading Jane Eyre, but I've only gotten through three chapters, and while I love the Bronte sisters and their literary masterpieces, I'd honestly rather just find out what happens between Katniss and Peeta. #sorryimnotsorry. Also, I got a new planner today on my weekly trip to Target. It's honestly kind of sad how excited I got about it. It matches the cover I have from last year, and it has a beautiful pattern on the pages. Oh yeah, this is supposed to be about cookies. Whoops.

These are seriously the easiest cookies you will ever make in your entire life. I made them in New York, and they were wonderful, so when I saw pink lemonade cake mix at WalMart today, I was overjoyed and purchased a box. Now, I've made cake mix cookies before, but apparently not many people have heard of them, so I'm trying to spread the word. Also, these are pink, which makes them ten times better, because I feel like princesses would only eat pink cookies. The lemonade flavor is really different than what you'd have every day, and it's great for summer! Anyways, here's what you'll need:
-1 box Pink Lemonade Cake Mix (I used Pillsbury, you can use whatever...if anyone else makes that kind)
-2 eggs
-1/2 cup vegetable oil
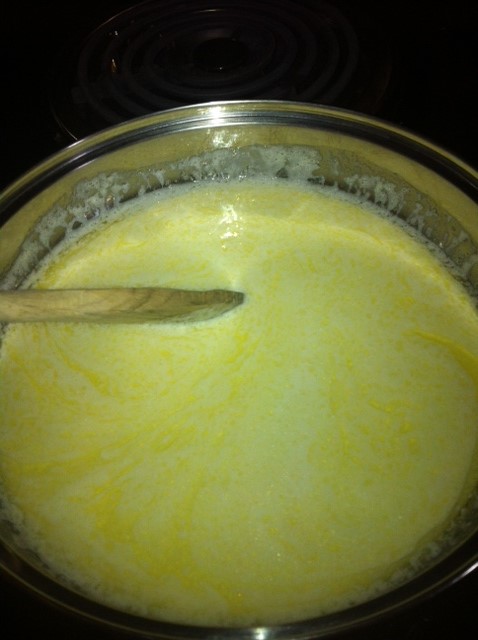
The beginnings of cookies fit for a princess. Or a 5-year old.


Here's what you do:

1. Pre-heat your oven to 350.

2. Mix together the cake mix, oil, and eggs, until you get a little pink bundle of joy like you see below. You might think that you need to add a little more liquid, but if you keep mixing, it'll be okay. I had a few lumps of mix left in mine, but I just said YOLO and continued on with my life. (not really, I hate that phrase. But I did leave them and it was fine.)

The dough reminds me of edible play-dough I made in my childhood. But it was peanut butter. But still awesome.

3. Next, spray your baking sheet with some pan. The dough is really oily, so it's probably not 100% necessary, but I like to be on the safe side.

4. Next, I rolled the dough into little balls and placed them on my cookie sheet. You could totally do rounded teaspoonfuls if that's your thing, but I like uniformity in my baking, so I chose to roll them.
My vain attempt at an artistic camera angle. I think I'll just stay on the other side of the camera. lawlz.
5. Bake for 12.5 minutes. This is very exact, and I'm kind of proud of that, since I was winging this one. You can tell when they're browning on the edges, and that's when they're done. But, if you take them out and they still aren't firm after a few minutes, I'd put them back in for like, 2 minutes. 12.5 should do the trick, but if you don't believe me, experiment at your own risk.
I love how they're crackly on top.


6. Eat them. (Not all of them, I don't promote obesity.)
Plate of Pink.


See how easy that was?? Just six steps, and the last one was unnecessary! Apparently you can make these with any cake mix, so the possibilities are basically endless. Except I'm not sure how it would work out with an angel food mix...someone please try that and let me know. Rebecca, the precious girl from Georgia that we met in Long Island, told us that if you use a lemon cake mix and use a little less oil and add a little lemon and orange juice, they're divine! So I'll probs be trying that one soon. Anyways, the point is, you're only a box, two eggs, and half a cup of oil away from wonderful cookies. I hope you try this and love it as much as I do! And I promise I'll write about New York next time. In the meantime, hopefully I'll find Mockingjay and fun activities to write in my new planner. Until next time!


Wednesday, March 14, 2012

Brownie Buttons- Recipe

Hey Cats!

Since I'm home for Spring Break this week, I actually have time to blog! I was planning on crafting as well, but then I went to Barnes & Noble & bought myself a couple of books, so crafts aren't really happening this week. Between the chapters of my British literature & hanging out with my family however, I whipped up some delicious cookies! I wanted to bake something, and we had a brownie mix, so I decided to get creative! Actually, I just Googled, but whatever. I've found you can find a recipe for basically everything if you google it. Anyways, I wanted to make cookies out of a brownie mix, so I typed in "brownie mix cookies" on the world's most convienient website, and took the first recipe I came across. (I'm going to write out the recipe, but here's the link, just to give credit where credit is due: http://www.cooks.com/rec/view/0,1710,148185-235195,00.html ).
Here's what you'll need!
1 box of brownie mix (I used Pillsbury)
1/4 cup of flour
1/4 cup vegetable oil
3 tbsp. water (I used a little less)
2 eggs
1 cup chocolate chips (I used 1/2 cup of chocolate chips & 1/2 cup of Heath Bar bits)

Here's what you do!
1. Mix everything together, except the chocolate chips, by hand.
2. Stir in the chocolate chips.
3. Drop by VERY VERY SMALL spoonfuls onto a greased cookie sheet.
4. Bake at 350 for 10 minutes!

The reason I suggest making them very small is because
1. The batter goes further. More cookies = more reasons to smile
2. This batter spreads like none other once it's in the oven. If they're too big to begin with, all the cookies will run together & make fat, ugly cookies, which is a personal peeve of mine.
3. Smaller cookies are much easier to remove from the pan. These are very fragile too, so the smaller you make them, the easier your life will be.

Also, I HIGHLY advise using Pam on the cookie sheet between each batch. For real, spray that stuff on thick. Scraping burnt-on crap off a cookie sheet is not what you want to be doing when you have a Jane Austen novel waiting for you. Or ever, really.

Here's what my first batch looked like (Please don't laugh...I learned from my mistakes.) :

This is why you make them small, or else they turn out looking like cow patties. By the way, I considered naming these creations "Cow Patty Cookies" for about .032 seconds, but then I decided that was disgusting. I may be from East Texas, but that's just too much. I hope I didn't ruin this for anyone by saying that....
Here's what they looked like once I finally figured everything out!
Much better! They're quite delicious, if I do say so myself. They're kind of chewy, and they taste pretty much the same as a brownie, they're just in cookie form. Well, I go back to school on Sunday (I can't wait for that, by the way), so it might be a while before I blog again. Maybe next time I'll give a literary analysis of Emma, if I have it finished by then. I would like to state that at this point, I think Emma is a bit of a brat & if I were Harriet, I would be royally cheesed off at her. But Harriet's stupid. I'll save this for another day ;) Until next time!

Friday, December 30, 2011

Recipe- "In Mint Condition" Brownie Bites

Hey Cats!

So, I'm very excited to share this recipe with y'all! It came about when my mom asked me to bake brownies for dinner with some of my extended family. Instead of just making a pan of brownies like your average person, I decided to get a little creative. Also,we had a package of chocolate and mint chips, and I didn't want to just mix them in the batter, so I melted them & drizzled it on top like ganache! Anyways, I'll just go ahead & let you try them for yourselves!
Here's what you'll need:
1. A boxed brownie mix & all the ingredients needed to make the brownies. I used Pillsbury Chocolate Fudge, but you can use whatever! Or if you're feeling super domestic, you can make the brownie batter from scratch!
2. One 10-ounce package of chocolate & mint chips. I used Nestle, but I think they might be a seasonal item, so if you're not making this around Christmas, I think you can get Andes chips, which would probably work just as well!

3. A muffin tin
4. Pam or other non-stick cooking spray. (VERY important)

Here's what you do:

1. Prepare the brownie mix according to the directions on the box.
2. Distribute evenly (mine was about two huge spoonfuls per hole) in a muffin tin coated VERY WELL in Pam. They stick a little no matter what, but I can't imagine what would have happened if I didn't use anything.
3. Bake at 350 for 12-15 minutes.
4. During the last few minutes of baking, melt half of the chocolate & mint chips, according to the directions on the package. For some reason, I expected it to be green since some of the chips were, but...it wasn't.It was a light brown.

5. Once the brownies are done, go around the edge of each brownie with a knife to make sure they don't stick. After they are cool, remove them from the muffin tins. You'll probably have to use the knife again & be very careful so they don't fall apart!
6. Drizzle each brownie with the chocolate. You can make designs if you have that kind of talent, and if you do, I applaud you. I always stick with the abstract look, it's easier & perfection is optional :).
7. Enjoy! If you let the chocolate set a little, it turns into a ganache-like consistency and is extra delicious!

I really hope you try these, they're super easy, but different from your average brownie! I have forbidden myself from going to Hobby Lobby until I finish my current project, so it might be a couple of days until I'm able to post again, but I promise it will be amazing! Until next time!